
Add a New Participating College (Logo)
Before you start make sure you have the following:
School logo image. To get an image email natalie@studioeightyseven.com.
You can follow the rest of the steps without it for now, and Natalie can add it for you when it’s ready.
School division (Division I, Division II or Division III)
The URL to the school’s soccer page. (For example, if you were adding Vassar the source URL would be https://www.vassarathletics.com/sports/womens-soccer.)

From Pages, navigate to Blog Posts “College Logos”, hover over it and click the arrow icon on the right.
2. Before adding a new school search the posts to see if it already exists. If the school you are looking for does already exist, skip to step 14. If it doesn’t exist yet, click the + icon to the right of “College Logos.”


3. Click on “Enter a post title” and type the name of the school you want to add. The name of the school you are adding is the title.
4. Click Publish at the top left of the window.


5. Find your new school at the top of the list of “posts.” Hover over it and click the 3 circles icon to the right, then click “settings.”

6. Add the the image. If you don’t have an image it is okay to skip this step for now.

7. Type the name of the school in the excerpt field.
8. Scroll down and add a source URL to the school’s soccer page. (For example, if you were adding Vassar the source URL would be https://www.vassarathletics.com/sports/womens-soccer.)

9. Toggle the “Link Post Title to Source URL” toggle on.
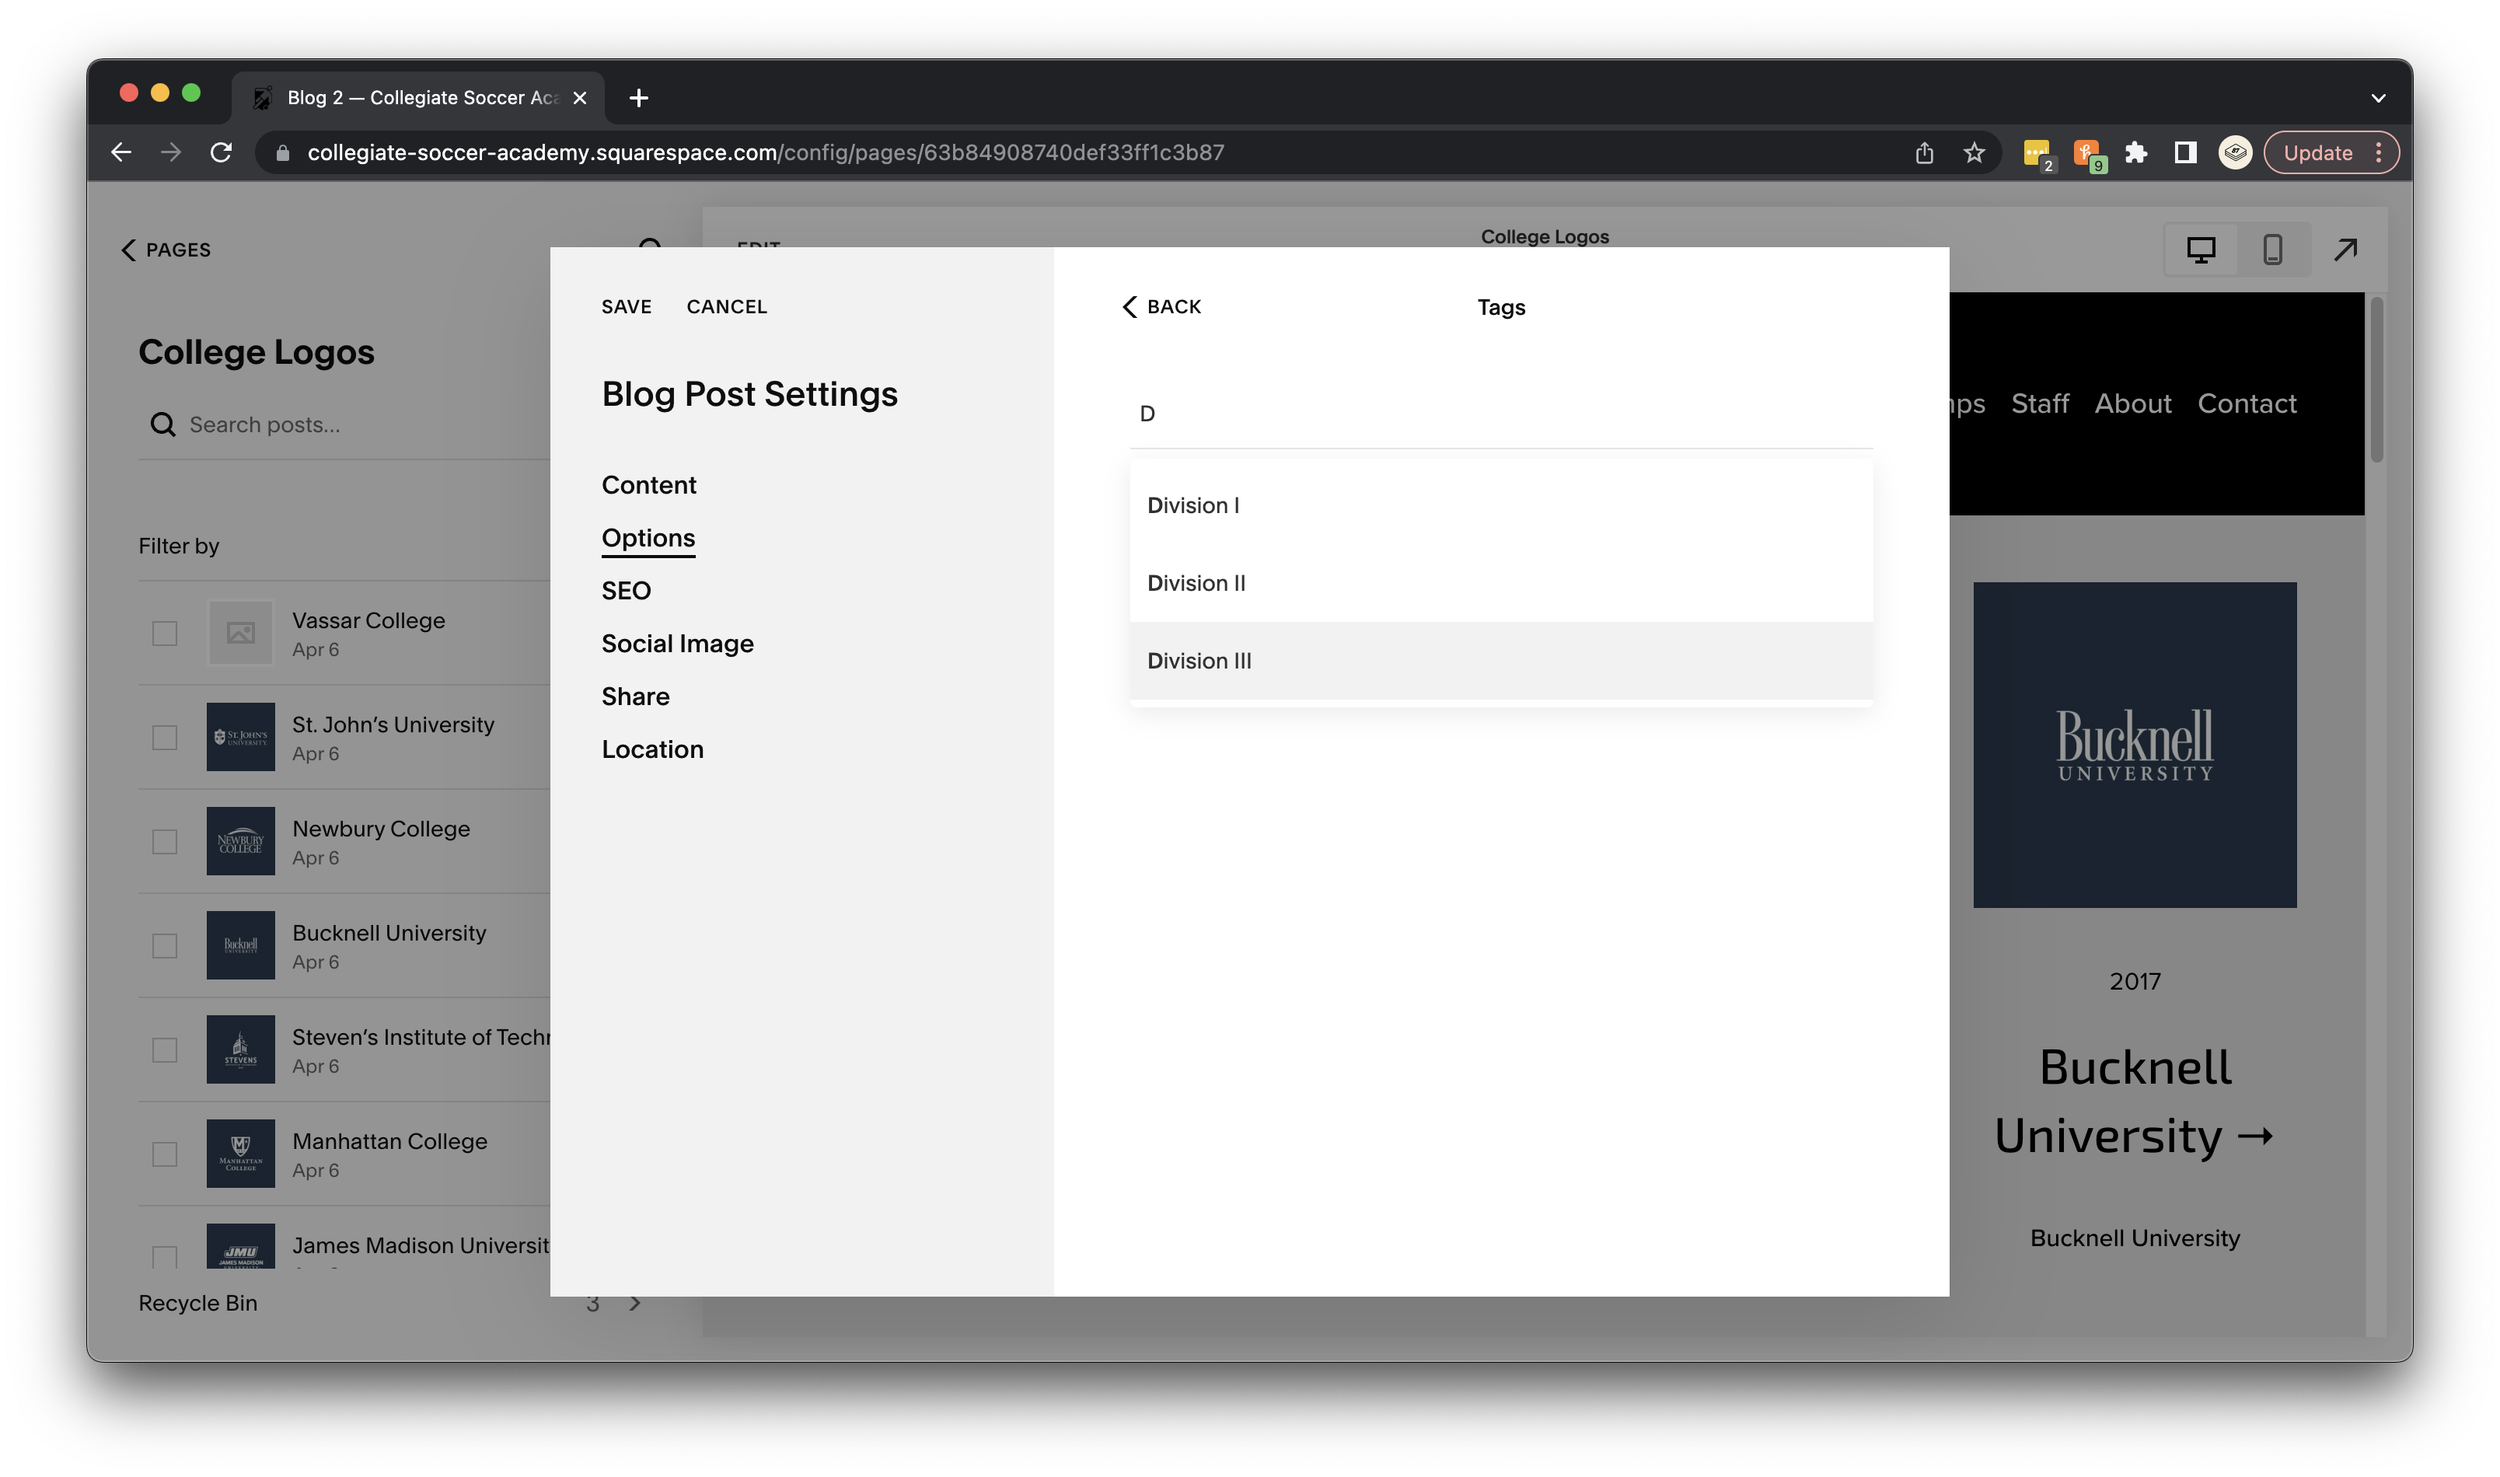
10. Next, click options from the Blog Post Settings on the left.


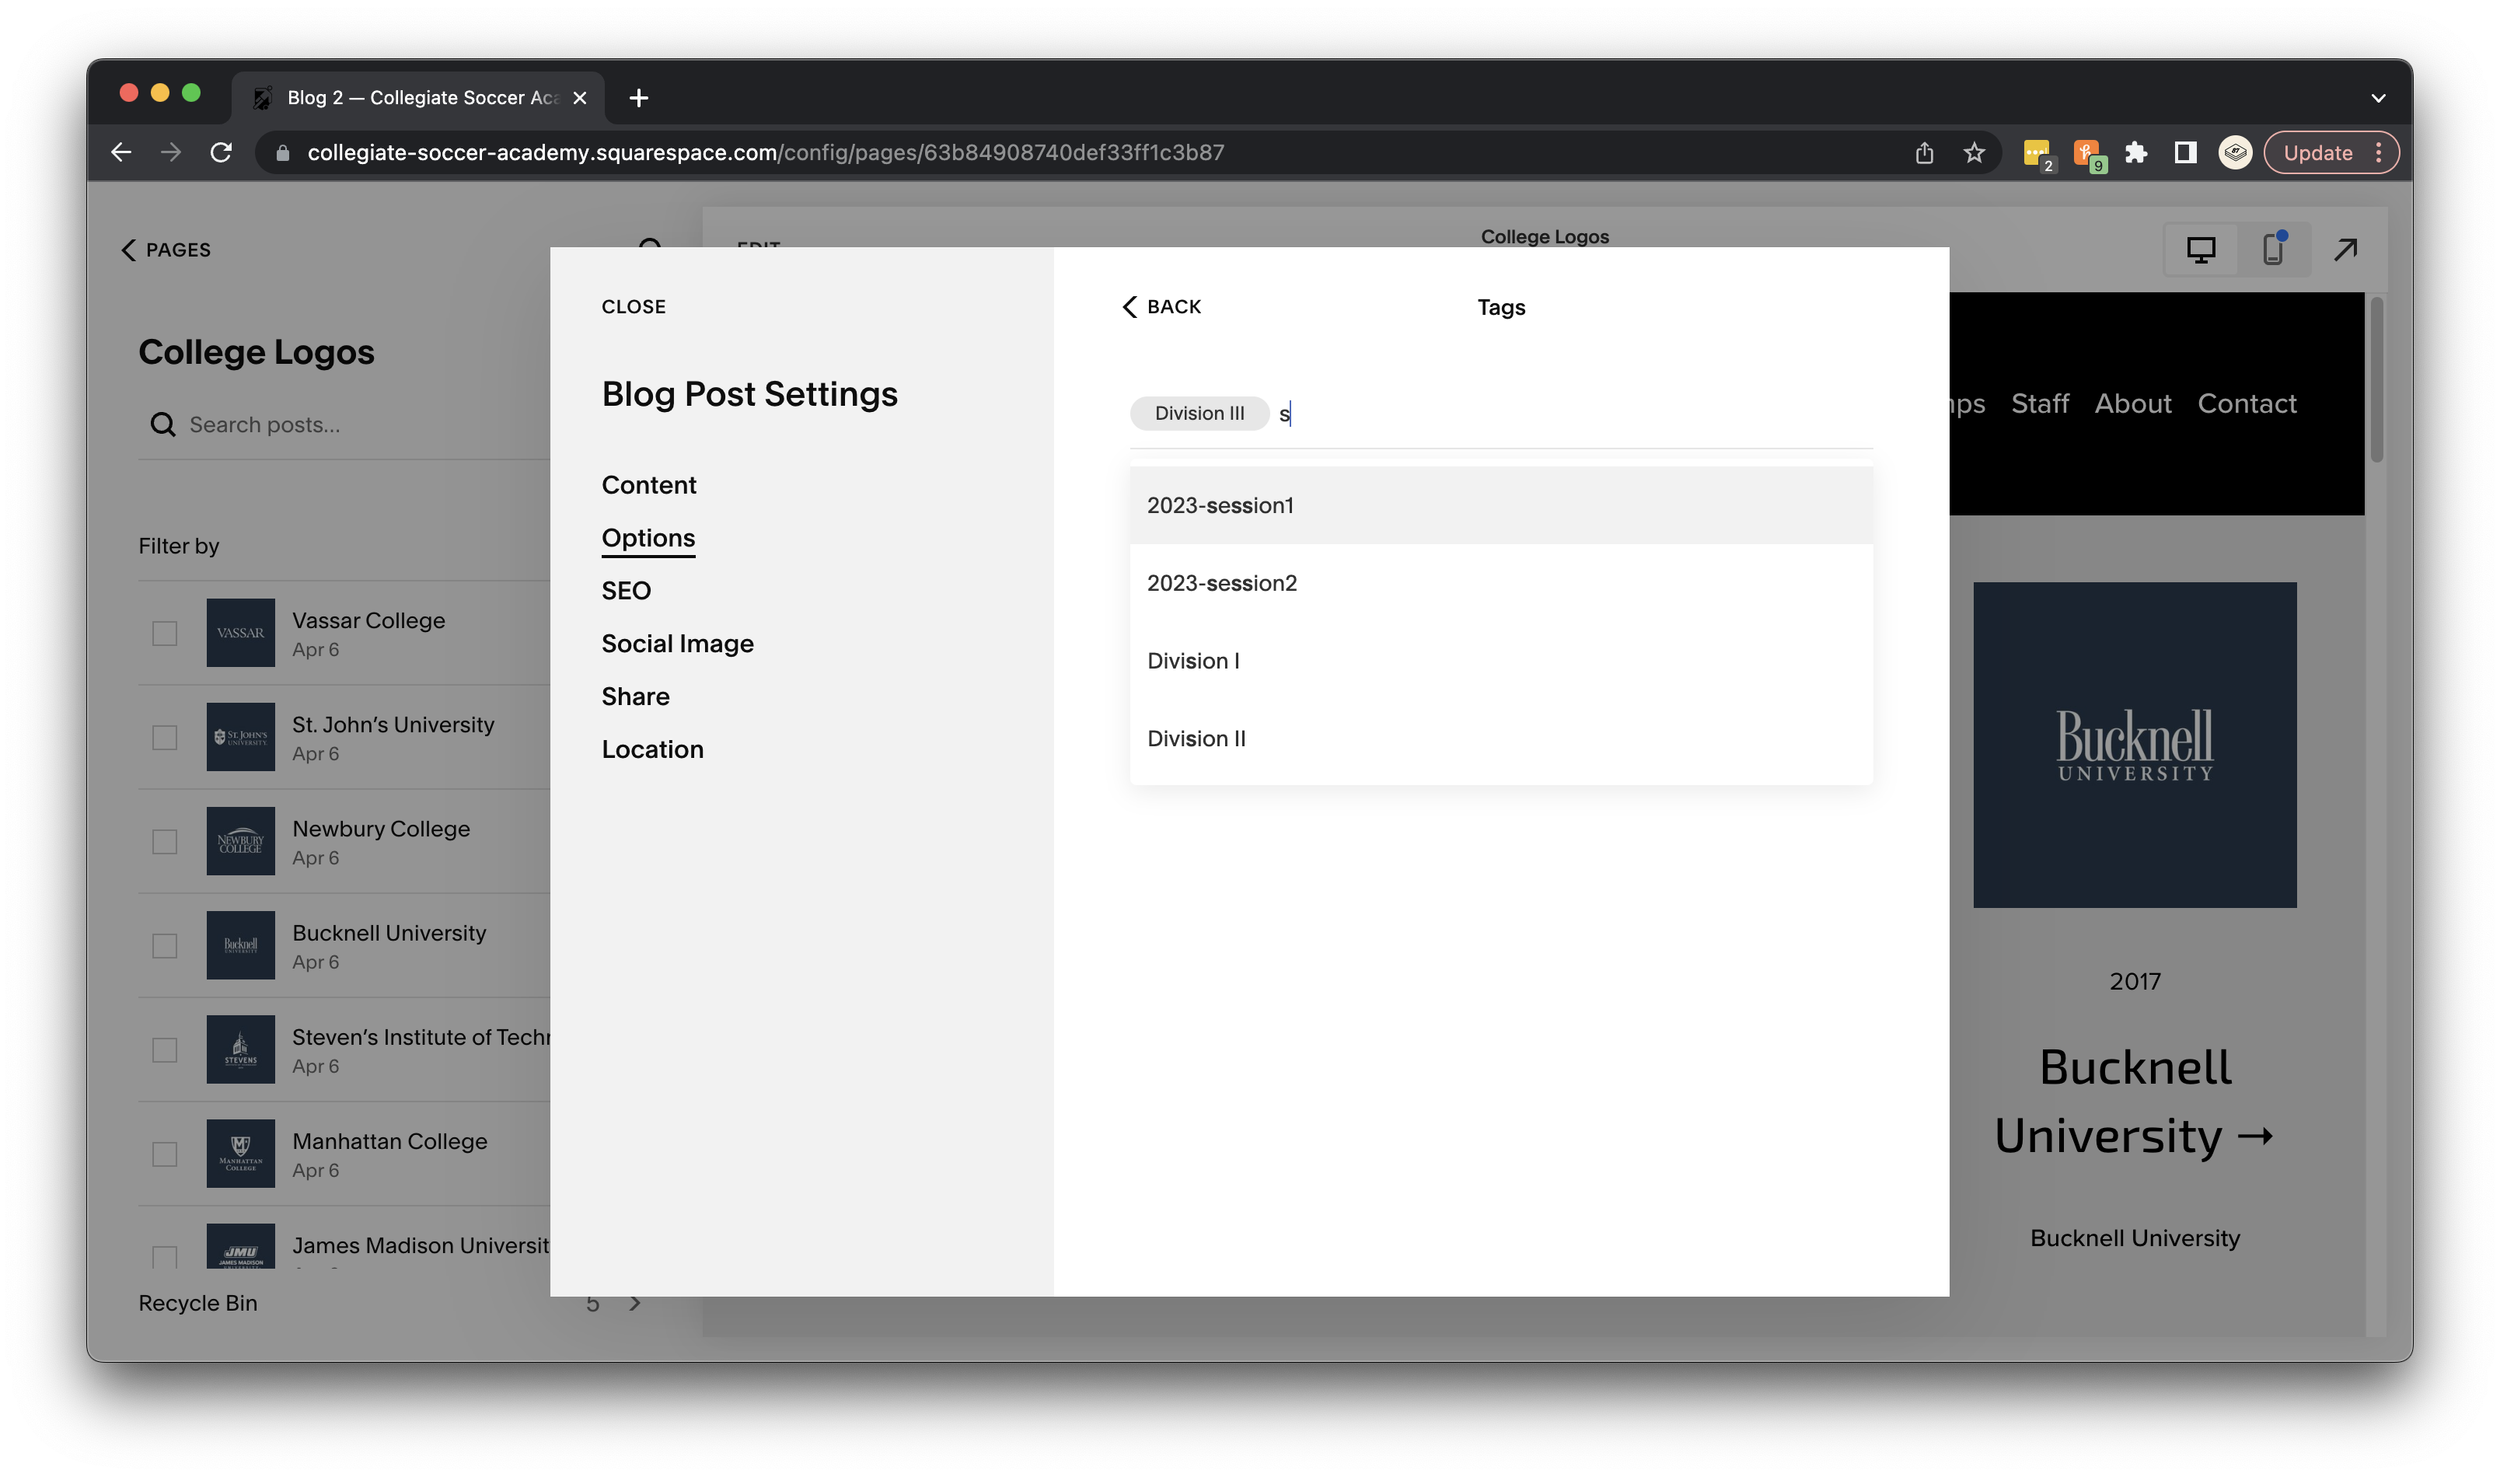
11. Click “Tags.” Add a Division Tag by starting to type “Division” and select Division I, II, or III. If this school is participating in the current year’s sessions, add those tags too. For example, 2023-session1.

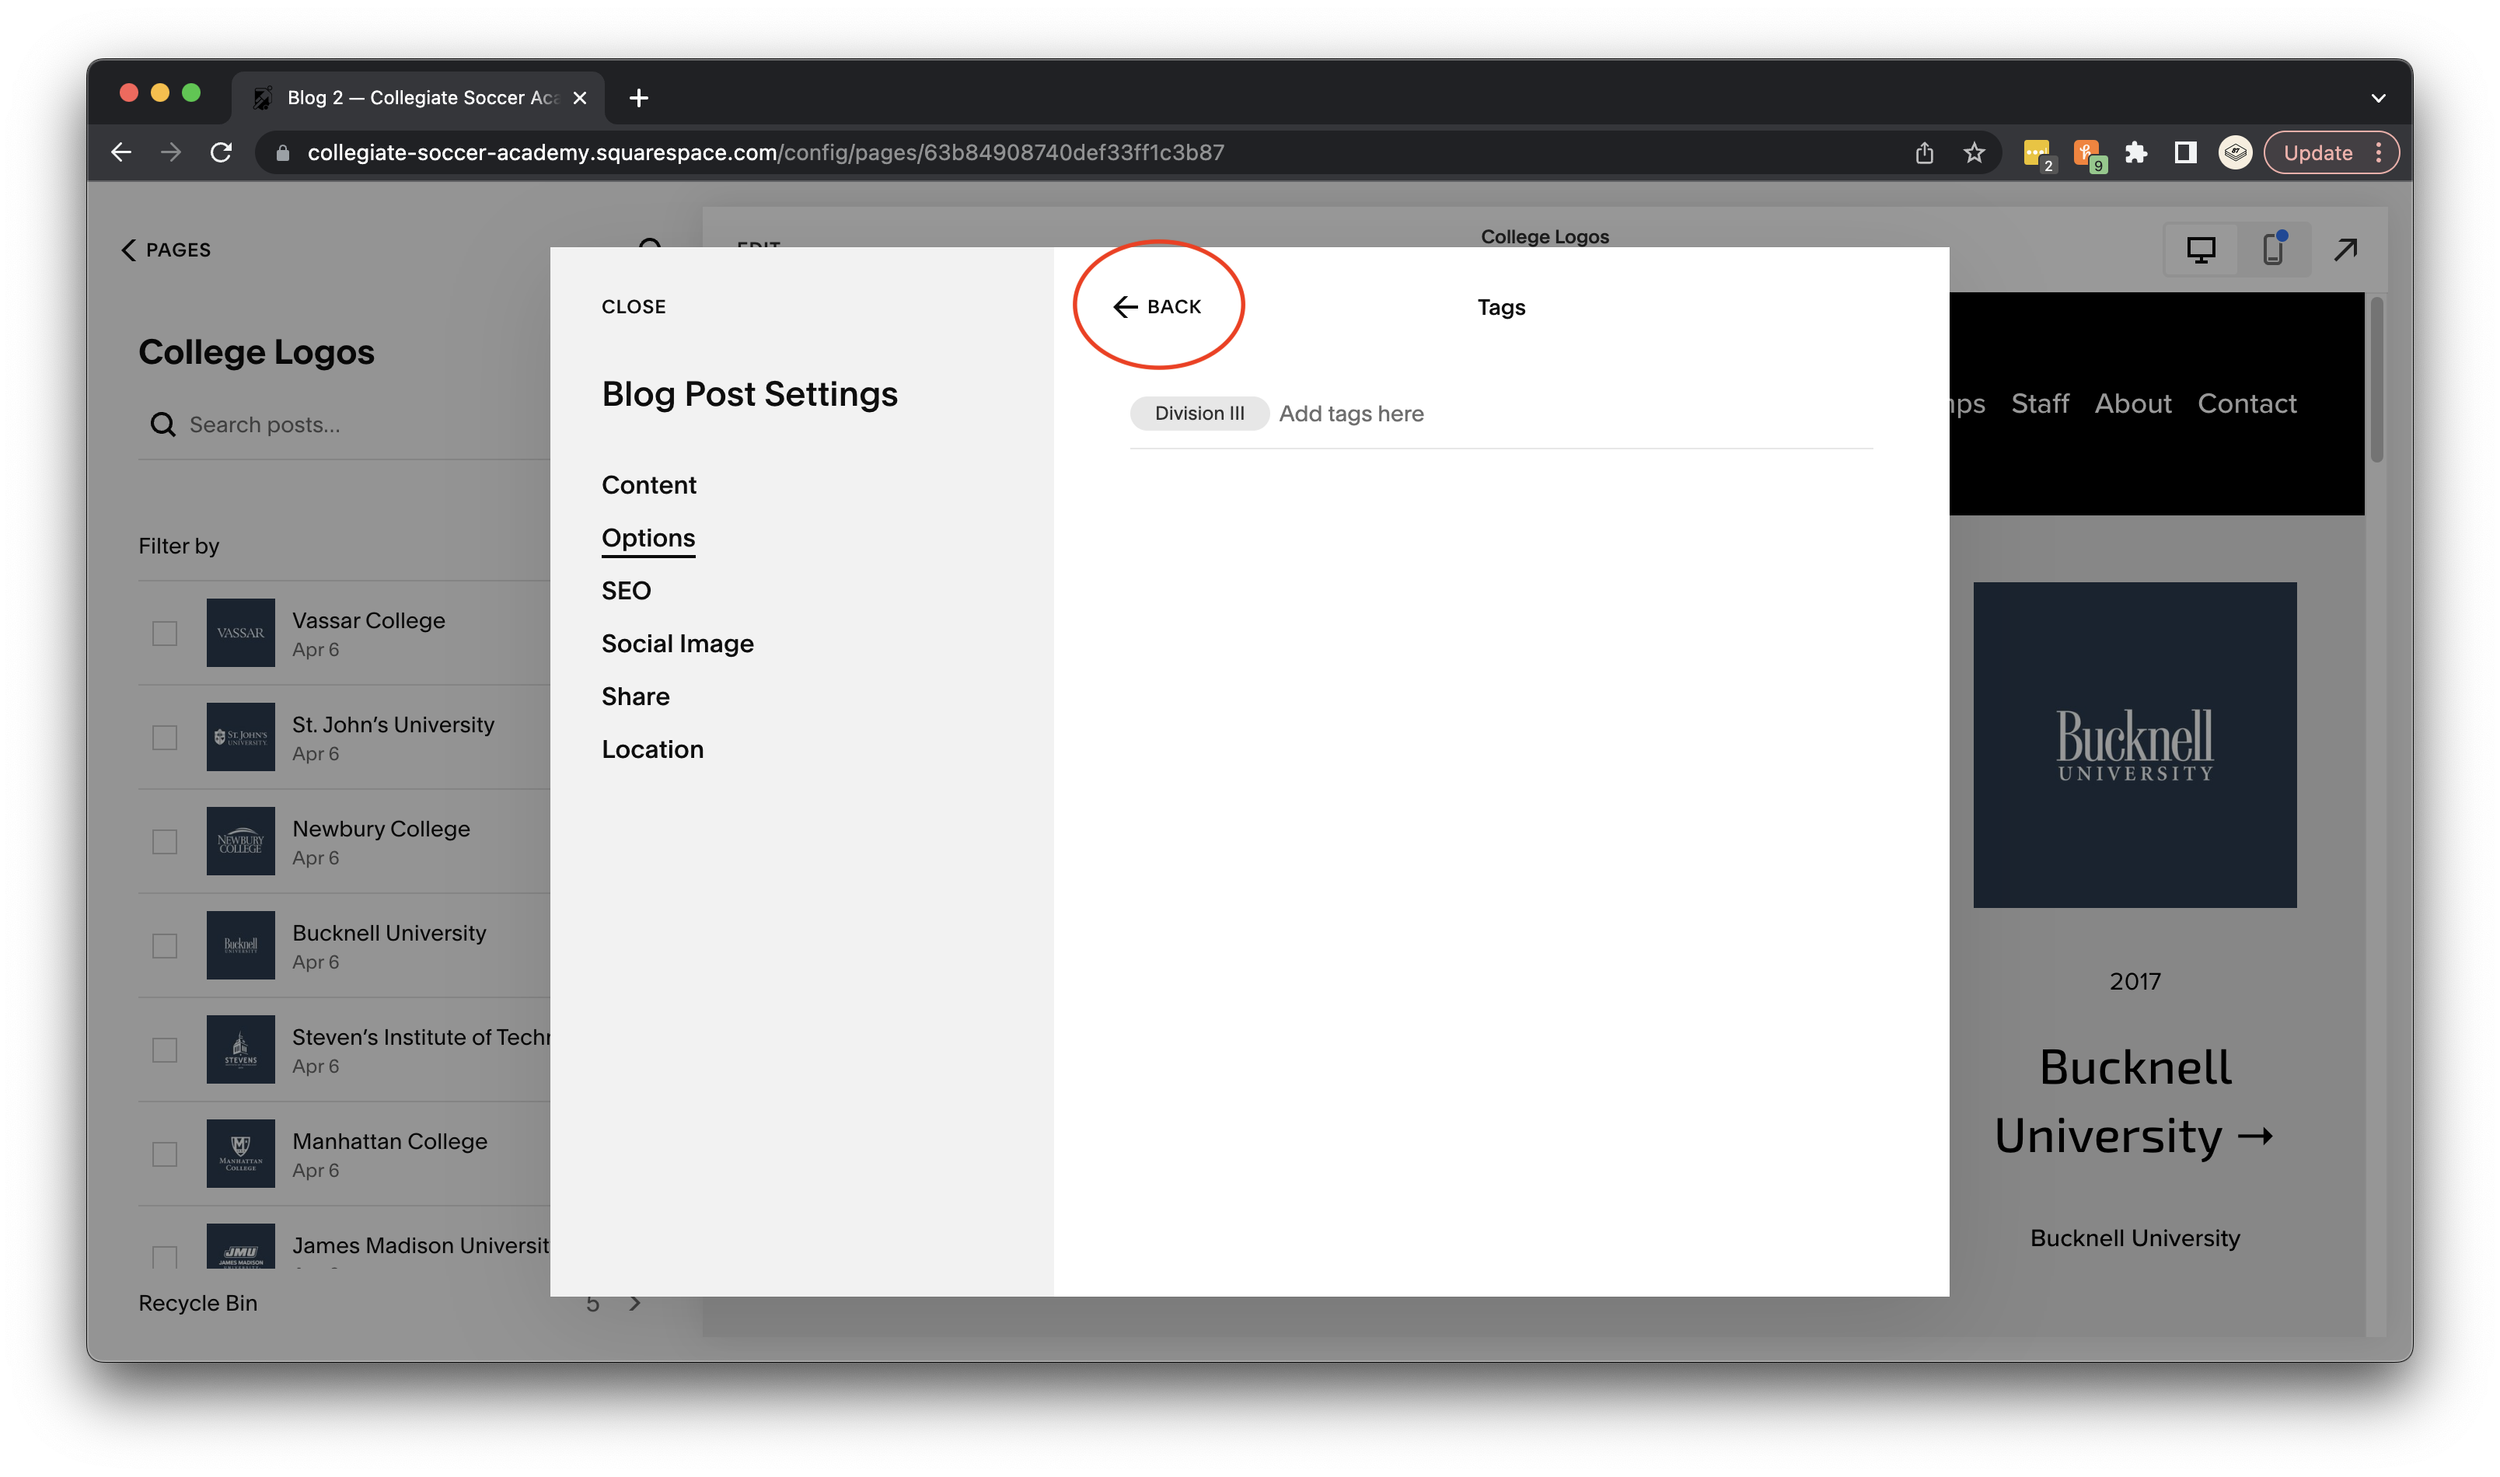
12. Click “Back,” and then “Categories.” Click your cursor on “Add categories here,” and add the year of the session this school is participating in. You can select from the drop down, or hit enter when you are done typing.


13. Once all tags and categories are entered, hit close in the top left of the window.
If a school already exists and you need to update for the current camp…

14. Find your new school at the top of the list of “posts.” Hover over it and click the 3 circles icon to the right, then click “settings.”
15. Next, click options from the Blog Post Settings on the left.
16. Click “Tags.” If this school is participating in the current year’s session(s), add those tags. For example, 2023-session1.
17. Click “Back,” and then “Categories.” Click your cursor on “Add categories here,” and add the year of the session this school is participating in. You can select from the drop down, or hit enter when you are done typing.
18. Once all tags and categories are entered, hit close in the top left of the window.